
The question we’re going to be looking at today is inspired by our course, Mastering GA4 With Google BigQuery.
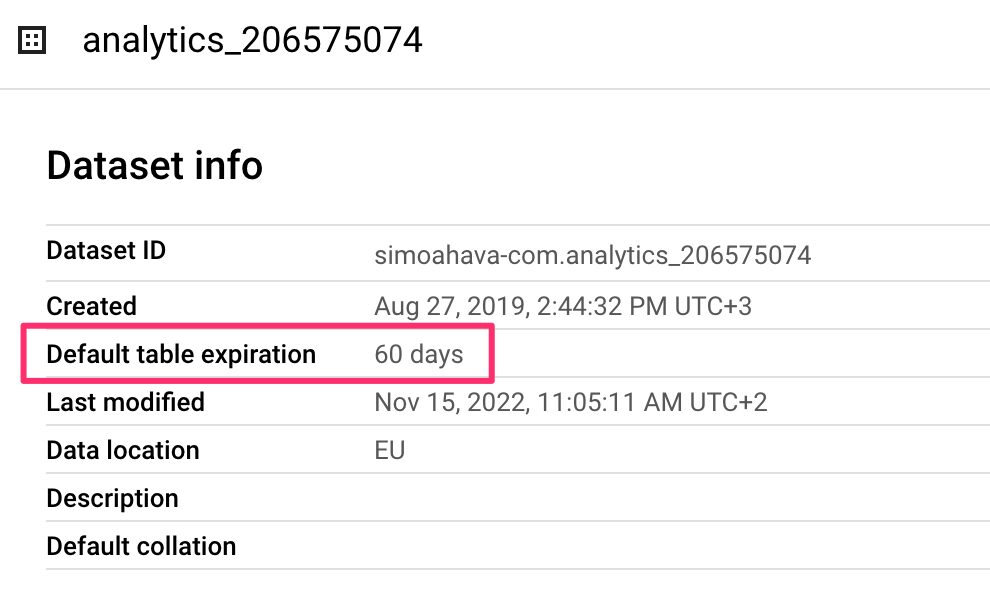
I changed the default expiration of my data set to Never, but tables are still expiring after 60 days.
When you set up a BigQuery account in the sandbox, you only have the ability to create datasets that have a default expiration of 60 days. After 60 days, each table is expired and the storage capacity is returned back to the quota.
When you upgrade your project by linking it to a billing account, this limitation is removed.
However, any tables that were already created in the sandbox will still have the default expiration of 60 days.
So the problem we need to solve is two-fold:
- How do we update the default expiration of the dataset to be something else than 60 days (Never, for example)?
- How do we update tables that were already created so that they won’t expire in 60 days’ time?
Query GA4 Data In Google BigQuery
Both questions can be easily answered with some user interface clicking. You can update the dataset by editing its properties, and you can update each table by editing their properties, too.
But this is very laborious if you have a total of 60 daily tables to go through.
In this article, I’ll show you a way to bulk edit your tables to change their expiration.
Video walkthrough
If you prefer this walkthrough in video format, you can check out the video below.
Don’t forget to subscribe to the Simmer YouTube channel for more content like this.

Edit the dataset properties
When you create a new BigQuery dataset in the BigQuery sandbox, you will have this default table expiration of 60 days.
When you upgrade your BigQuery project, you can extend this expiration further into the future or disable it entirely, so that tables never expire.
Default table expiration means that any new tables created in this dataset, such as the daily exports from Google Analytics 4, will automatically be set to expire in 60 days since their creation.
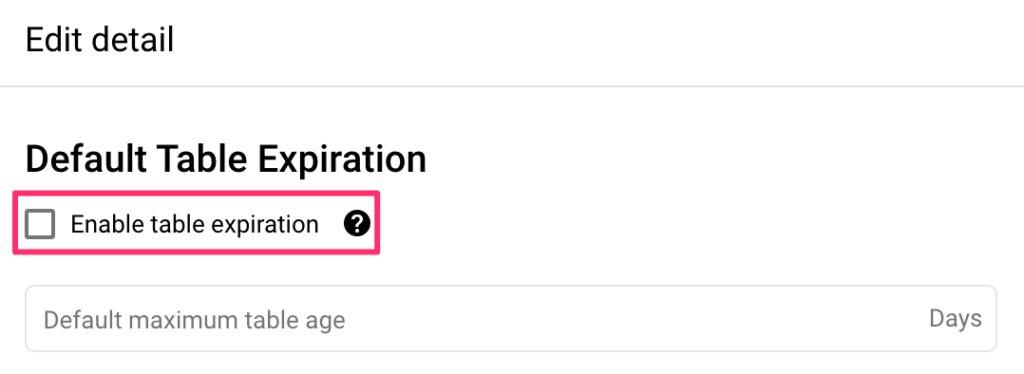
To change the default table expiration for a dataset to Never is easy. Select the EDIT DETAILS button in the dataset overview screen and uncheck the Enable table expiration option.
When you do this, any table that is created in this dataset from this moment forward will not have an expiration date.
This is great, but it leaves you with a problem. If your dataset was already populated with tables, they will still have the expiration date, because the Default table expiration option for the dataset only updates table expirations for future tables, not for those that already exist.
Update the expiration time for existing tables
So we need a way to update the expiration for existing tables so that they won’t disappear in 60 days since their creation.
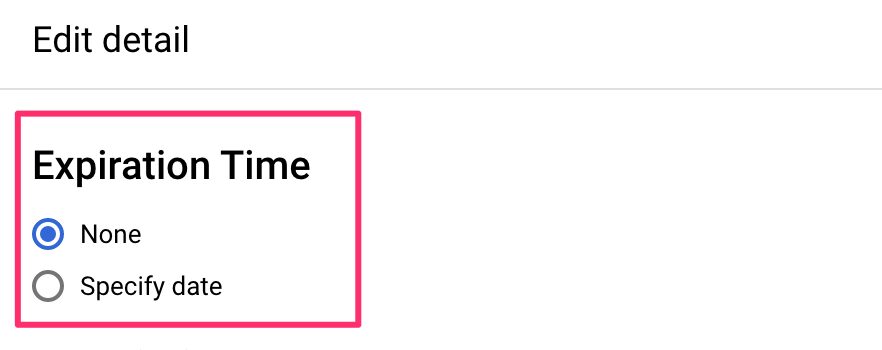
You could open each table in the BigQuery user interface, click to edit their details, and manually toggle the expiration date off.
But this can mean a lot of clicking around. There must be an easier way to do this, especially if you have dozens of tables to update.
An alternative approach is to run an ALTER TABLE query in BigQuery itself. With this query, you can take a table and update its options such as the expiration timestamp and set it to null (that’s the same as Never).
ALTER TABLE
  `simoahava-com.analytics_206575074.events_20221101`
SET
  OPTIONS(expiration_timestamp=null)
But just doing the query with SQL isn’t very rewarding – it’s even more work than just clicking open the table settings and unchecking a checkbox.
Instead, we can use Data Definition Language (DDL) statements in Google BigQuery to run some programming logic around the table modification commands.
What we want to achieve is a query that loops through all the tables in the dataset and runs the ALTER TABLE command for each table encountered in the loop.
Here’s what the DDL implementation looks like:
DECLARE list_of_tables ARRAY<STRING>;
DECLARE counter INT64 DEFAULT 0;

EXECUTE IMMEDIATE
  'SELECT ARRAY(SELECT distinct table_name FROM `project.dataset.INFORMATION_SCHEMA.COLUMNS`)'
  INTO list_of_tables;

LOOP
  IF counter = ARRAY_LENGTH(list_of_tables) THEN
    LEAVE;
  END IF;

  EXECUTE IMMEDIATE
    CONCAT('ALTER TABLE `project.dataset.',list_of_tables[offset(counter)],'` SET OPTIONS(expiration_timestamp=null)');

  SET counter = counter + 1;
END LOOP;
You’ll need to update the project and dataset IDs on lines 5 and 14 before running the code.
On lines 4–6, the code pulls in all the table names in the dataset into the array named list_of_tables. A counter is also initialized – we’ll use that when looping through the array of table names.
On lines 8–17 we run a loop which goes through all the table names in the array, and runs the ALTER TABLE command for each, concatenating the table name with the dataset signature.
Finally, the counter is incremented by 1 with each iteration, and the loop is aborted as soon as the counter reaches the end of the array.
When you run this query, you’ll see a list of processing steps, because each iteration of the loops runs its own BigQuery process. It might take some time if you have a lot of tables to update.
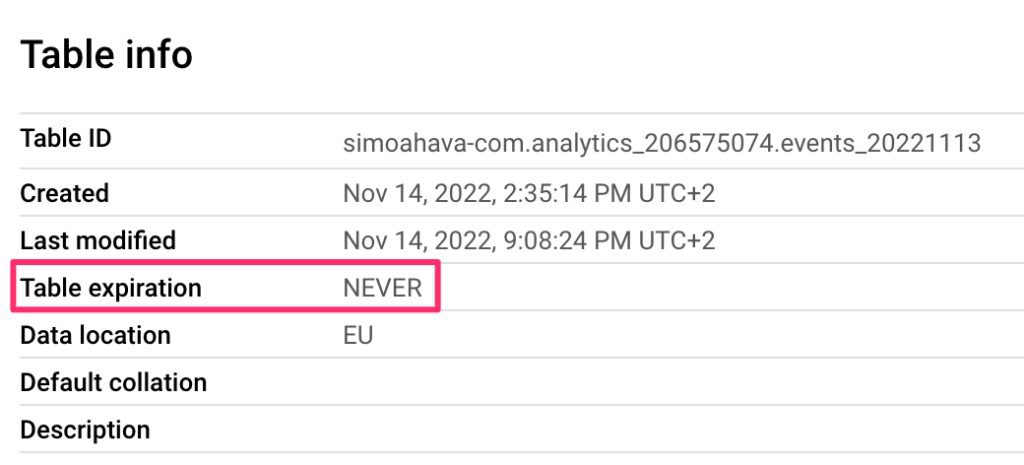
When you now open any of the updated tables, you should see how their expiration date has been dynamically changed to Never.
Summary
DDL can be a great asset when you need to run complex or time-consuming metadata updates on your BigQuery assets.
In this case, we looped through all the tables of a dataset to make sure that they don’t expire prematurely. Just remember to update the default expiration of the dataset to Never, too, so that any tables that are created in the future won’t need to be updated – dynamically or manually.

9 Responses
Thanks for this – it’s super helpful! What would it look like if I wanted to change the expiration to, say, three years?
Hi!
It should work with
expiration_timestamp=TIMESTAMP_ADD(CURRENT_TIMESTAMP(), INTERVAL 3 YEAR)Thanks! FYI, the YEAR interval is not supported in the TIMESTAMP_ADD function, so one would use DAY instead (e.g. INTERVAL 1095 DAY).
Ohhh, good point, thanks!
Thanks a lot! Works perfect and pretty fast. You just saved a lot of time for me
Magic. Thanks a lot!
FYI: I got an error response. Could there be something to take into consideration if the data set in not in the us.
Error message: Not found: Dataset {{project}}:{{dataset}} was not found in location US at [1:1]
I found that I needed to specify the location in the parameters. Here is the documentation: https://cloud.google.com/bigquery/docs/locations#specify_locations
Hi!
You need to make sure that the query is processed in the same region as the dataset. As you can see in the examples of the article, my dataset is not in the US either. You can modify this in the query settings.